Pages

Monday, June 17, 2013

Elmo 2nd Birthday Party

My daughter LOVES Elmo, so of course I wanted to throw her an Elmo 2nd Birthday party.  It was so much fun to make everything for, with a special thanks to my sister for making the cupcakes!  Many of the pictures have links to how I made them.  Enjoy!

The Birthday girl and Mommy
Favor table.  Favors were goldfish, crayons, bubbles and a little candy.
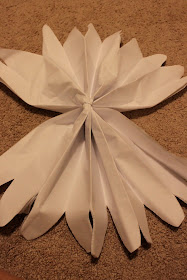
Tissue paper pom poms.  Click on picture for tutorial.
Made a collage on shutterfly with pictures from each month (12 month-24 months)  Frame from Hobby Lobby.
Of course Elmo's 2 favorite things...tags from Hobby Lobby with white marker writing.  Printed the goldfish offline...google : )
Cupcakes make by my sister!


#2 made of cupcake liners...Click on picture for tutorial.
Happy Birthday Banner

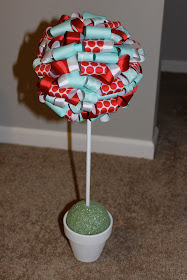
Fun ribbon topiaries...click on picture for tutorial.
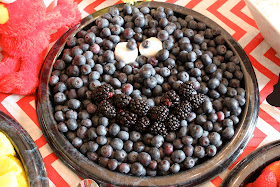
Veggie and Fruit trays to look like Zoe, Oscar, Big Bird, Cookie Monster, Elmo.


 My special Birthday girl!


Elmo Pom Poms

Supplies:
Tissue paper-8 sheets
Small piece of wire, or twist tie
Scissors
Construction paper-for character face
Hot glue
String to hang it up
   
Take your tissue paper out of the package and lay it all flat.  Stacked in a pile of 8 pieces.  Begin folding it like a fan, with a width between 1 to 2 inches.
 Continue folding until all the sheets are folding and stacked like this.
In the center wrap with your metal wire or twist tie.  This is also a good time to add a loop of wire, so that you can attach your ribbon to hand it by later.
Cut both edges to round them, make sure all layers are included in the cutting.
Lay in flat and fan out the 2 sides.
Then begin pulling up and spreading the layers out.  This takes a little time.  Arrange and fluff to how you like.
Your fluffing will create a nice circle poof.
Once your pom pom is created you can make your character face to fit.  I cut mine out of card stock paper.  We did Elmo.  If you are not putting a face on it, skip down past the elmo pom pom picture.
Once your face is cut out, hot glue it to the front of your pom pom.  *Tip: Make sure your pom pom is in the right direction with the inside loop so the face will hang correctly. You don't want an upside down face* 
Choose whatever ribbon you want to hang the pom poms from and attach it to your inside loop.  I used tulle.  Hang up for your party and enjoy.


Wednesday, June 5, 2013

Birthday Numbers

Second Birthday, #2!

Supplies:
Cardboard
Exacto knife or utility knife
Cupcake liners, For this large 2 I needed around 175 liners
Hot glue gun and glue
We cut out the number 2 from an old box.
Squish your cupcake liner and place hot glue on the bottom.
Begin glueing them to the cardboard, putting them close together to fully cover the cardboard.
Your finished product!  Could be made in any number of letter.


Ribbon Topiaries

Love this idea for any party and color scheme, they are so cute!

Supplies:
Small terra cotta pot
5 inch floral ball
Smaller floral ball, that fits in your pot
Your choice of ribbon, you need a good amount
Wooden dowel
Tissue paper
Pipe cleaners (optional)
Paint and foam brush
Hot glue gun and glue
Dress pins, lots!

Cut your ribbon to your desired length, I choose 4 inches.
 Create a circle loop with your ribbon.
 Begin pinning the circle loops to your floral ball.  The larger ribbons may take 2 pins.
 I did not do a pattern, I just started pinning and seeing what looked good, pinning them tightly together.
 

Paint your pot and dowels your desired color, may take a few coats.  Don't worry about painting the inside of the pot, you will not see it.  Allow to dry.  Also, cut your dowel to your desired length.
Take your painted dowel and push a hole about half way through your ribbon ball.  Fill the hole with hot glue and then place your dowel back in it.  Allow to dry. 

 Place the smaller floral ball in your pot.
 Do the same as above, poke a hole in the center for your dowel, then place glue in the hole and replace the dowel with ribbon ball on it.  Allow to dry.  *If you wish to add pipe cleaners, do so now.  I wrapped them around my finger to get them to curl and stuck them into the floral ball*
Cut small squares of tissue paper.
 Squish them together and hot glue them to the bottom floral ball, until it is covered.
Your completed project!